KeyChainino · Software
How timer overflow interrupt works
Hi Guys,
Today I want to show you how timer overflow interrupt works.
All the timers in the Arduino microcontroller – and in every microcontroller – are simple counters.
These counters are increased – usually – by the main clock of the microcontroller.
Every time we have a clock cycle – the time between two adjacent pulses of the main oscillator – the counter increases according to the prescaler set for that timer.
The prescaler is used to reduce a high frequency counter to a lower frequency by integer division. The prescaler takes the basic timer clock frequency and divides it by some value before feeding it to the timer.
This means that you can reduce the frequency of the timer.
Well, when the timer counter reaches its maximum value – which means that, if the timer is an 8-bit timer, it can reach at most 255 – the timer goes back to zero.
At this specific moment, the timer overflow interrupt occurs.
This means that we can do something at the frequency that we want.
For example:
We want to blink an LED at a frequency of 50 Hz. What do we need to do?
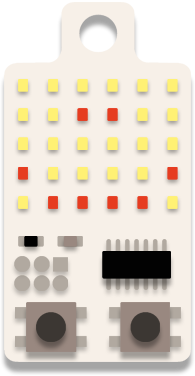
Well, the frequency of the microcontroller – for example the Attiny84 used in KeyChainino – is 8 MHz.
Let’s say we use Timer1.
To decrease the frequency we need to use a prescaler. So take a look at the Datasheet of this specific microcontroller.

You can see that the Timer 1 – called Timer/Counter 1 – can be set by the TCCR1B register. In this specific case, Timer 1 is a 16-bit timer: this means that the maximum timer value is 65536.
“The bits 2:0 select the clock source to be used by the Timer/Counter”. Good, it’s our prescaler!
We can manipulate these bits to set a different prescaler.
Because we want 50 Hz timer frequency, we need to set the prescaler so that the main clock frequency – 8 MHz (8.000.000 Hz) – is reduced to a small value.
We can set the prescaler to 1024 so now our timer frequency is
8000000/1024 = 7812,5 Hz
The resulting frequency is too high for our 50 Hz. We need to further reduce the frequency. How?
We need to set the timer counter TCNT1 to 65380, according to these calculations:
8000000 / 1024 = 7812,5 Hz
7812,5 / 50 = 156,26
65536 - 156 = 65380

where:
- 8000000 is the main clock frequency in Hz
- 1024 is the prescaler that we have set
- 50 is the frequency that we want in Hz
- 65536 is the maximum timer value
Because, as we said, the timer will be cleared after it reaches its maximum value, we subtracted 156 from its maximum value. In this way the timer will overflow with the frequency of almost 50 Hz. (Precisely every 8000000/(156*1024) = 50,08 Hz)
But we need to set the TCNT1 register to 65380 at every overflow.
Finally, let’s do it in an Arduino sketch:
int LED = 1; //LED pin

void setup()
{
  pinMode(LED, OUTPUT);

  // initialize Timer1
  cli();         // disable global interrupts
  TCCR1A = 0;    // set entire TCCR1A register to 0
  TCCR1B = 0;    // set entire TCCR1A register to 0

  // enable Timer1 overflow interrupt:
  bitSet(TIMSK1, TOIE1);
  // preload timer 65536 - (8000000 / 1024 / 50)
  TCNT1 = 65380;

  // set 1024 prescaler
  bitSet(TCCR1B, CS12);
  bitSet(TCCR1B, CS10);

  sei(); // enable all interrupts
}

ISR(TIM1_OVF_vect) {      // interrupt overflow routine
  // preload timer
  TCNT1 = 65380;
  digitalWrite(LED, digitalRead(LED) ^ 1);
}

void loop()
{
  // your program here...
}
This timer overflow interrupt is used on KeyChainino, with higher frequency, to update the Charlieplexing Matrix.
is maximum timer frequency and overflow value both are same
Hi Krishn,
I don’t quite get your question. Can you explain what do you mean?
Thanks