
Follow these steps to program KeyChainino 144 with Arduino or an ISP Programmer:
STEP 1: Download and install the Arduino MiniCore library
- If you haven’t already, download and install the Arduino IDE from the official Arduino website. Follow the instructions for Windows, macOS, or Linux.
- Install the MiniCore library:
- Open the Preferences dialog in the Arduino IDE.
- In the “Additional Boards Manager URLs” field near the bottom, paste the following URL (use a comma to separate it from any URLs already present):
https://mcudude.github.io/MiniCore/package_MCUdude_MiniCore_index.json - Click OK to save your preferences.
- Open the Boards Manager from the Tools > Board menu.
- Select “MiniCore by MCUdude” and click “Install”.
- Close the Boards Manager. You should now see an entry for MiniCore in the Tools > Board menu.
STEP 2: Install the KeyChainino Library Manually
- Download the KeyChainino library zip file from this link.
- In the Arduino IDE, go to Sketch > Include Library > Add .ZIP Library….
- Select the downloaded zip file. The library will be installed automatically.
STEP 3: Configure the Arduino Board as an ISP Programmer
We will use an Arduino board as an in-system programmer (ISP) to program the KeyChainino.
- Open the ArduinoISP sketch from the Examples menu.
- Select the appropriate board from the Tools > Board menu and choose the correct serial port from Tools > Port.
- Upload the ArduinoISP sketch to your Arduino board (for example, an Arduino UNO).

STEP 4: Connect the Arduino Board to KeyChainino
Follow the diagram below to connect the Arduino board to the KeyChainino:
NOTE: You don’t need to solder the connector to the KeyChainino. Simply insert the 6-pin header into the KeyChainino and hold it gently in place during the upload.


STEP 5: Configure Board Settings (Optional Bootloader Burn)
- Mandatory: Configure the board settings as follows:
- Board: ATmega328
- Clock: 8 MHz (internal)
- BOD: disabled
- Compiler LTO: disabled
- Variant: 328P / 328PA
- Bootloader: No bootloader
- Ensure the serial port is set to your Arduino board.
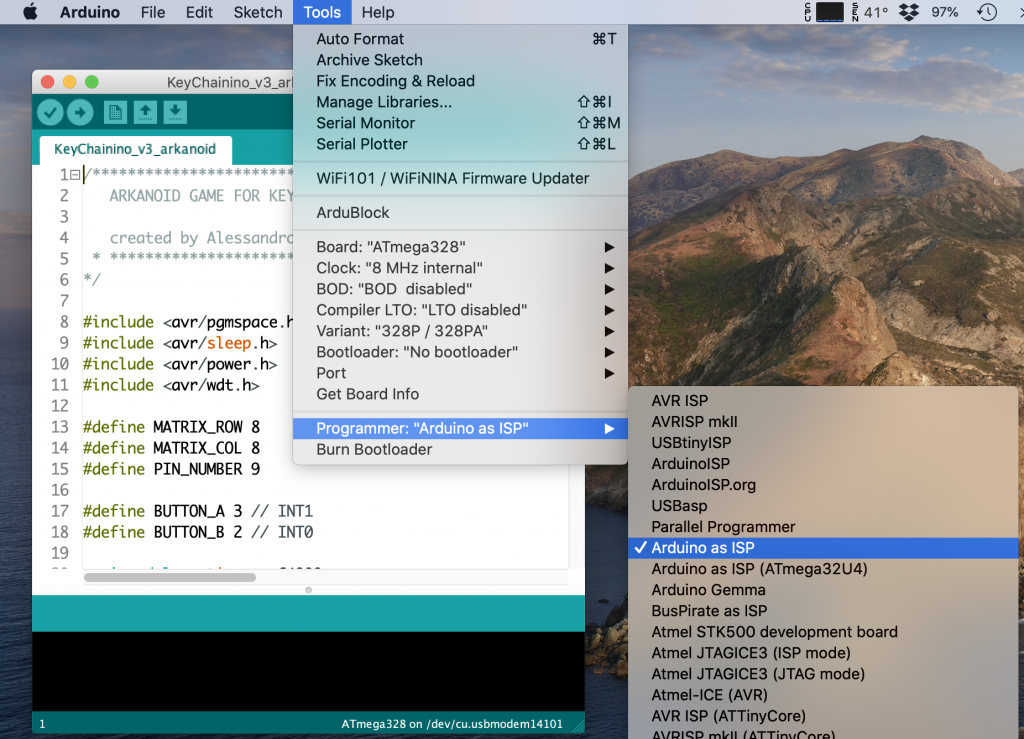
- Select Arduino as ISP from the Tools > Programmer menu.
- ⚠️ Important: Always configure the board settings above.
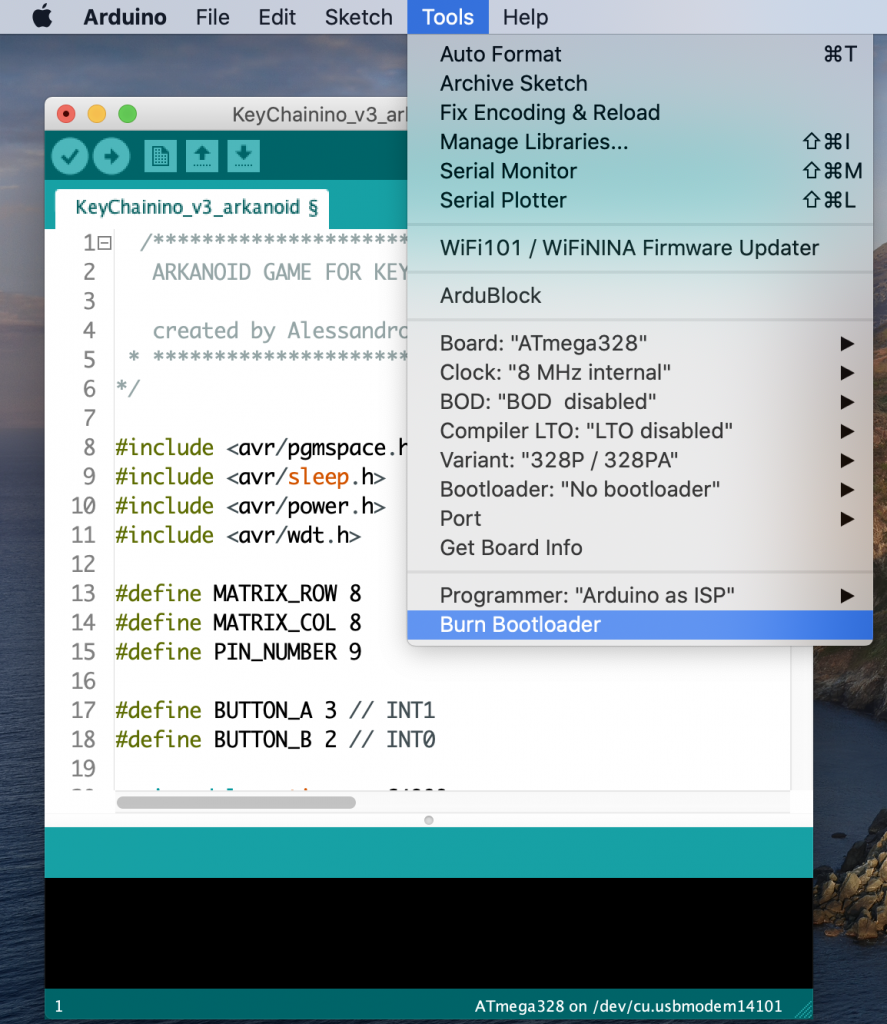
- If you purchased a working KeyChainino, you do not need to burn the bootloader. Otherwise, if required, remove the battery from the KeyChainino and burn the bootloader using the Tools menu.

STEP 6: Upload the Sketch to KeyChainino
- Download the Arkanoid Game Sketch for KeyChainino 144 from this link.
- Open the sketch in the Arduino IDE.
- Verify that the following settings are configured in the Tools menu:
- Board: ATmega328
- Clock: 8 MHz (internal)
- BOD: disabled
- Compiler LTO: disabled
- Variant: 328P / 328PA
- Bootloader: No bootloader
- Ensure the serial port is set to your Arduino board.
- Select Arduino as ISP from the Tools > Programmer menu.
- ⚠️ Important: Make sure the battery is removed from the KeyChainino before uploading.
- Upload the sketch.
You should see “Done uploading.” in the Arduino IDE without any error messages.
Reconnect the battery on the KeyChainino and start playing!
P.S. For subsequent uploads of different sketches, it is not necessary to burn the bootloader again; simply upload the sketch.


Do you ship to India?
Sure!
same for 144?
Yep!
Hi, do you plan to update your Basic Sketches and KeyChainino_Schematic PDF on Github to match the 144 LED Version?
Kind regards, Hans
done!
You are the greatest! Thank you so much! ????????????